Have you ever taken pictures you just wished were a lot more colorful? Ever felt the need to cram that extra little bit of color out of a seemingly perfect picture? Thanks to a tutorial and some personal research I have come up with a very simple and effective method that will highlight and increase the colors in a photo. Let’s get going!
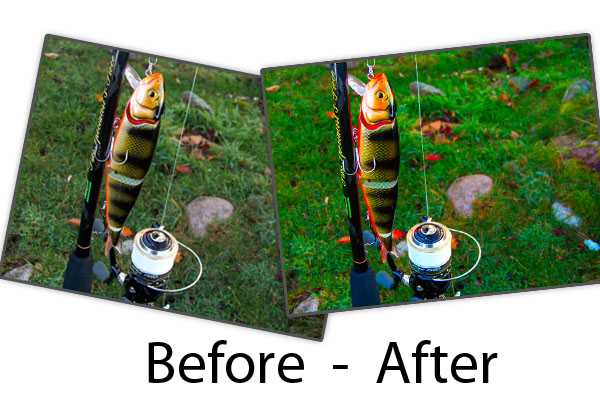
This is the image we will come up with, in comparison with the old one.

Steps
#1
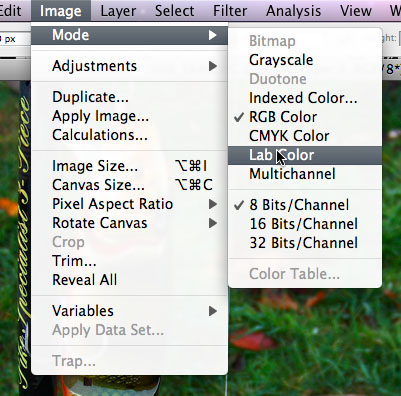
Change the color mode to “Lab Color” inside Image > Mode > Lab Color. This is the main start-off point and plays a key role in this tutorial.

#2
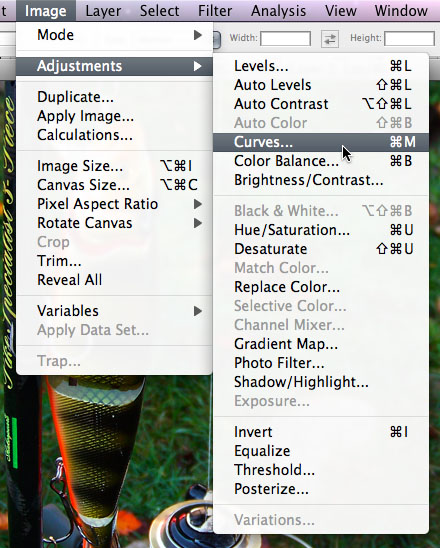
Select Curves in the Image > Adjustments > Curves. Using this tool we will now edit the colors to perfection!

#3
In the Channel drop-down, select a and b respectively and change the curves to something that resembles this.
a-curves
b-curves
#4
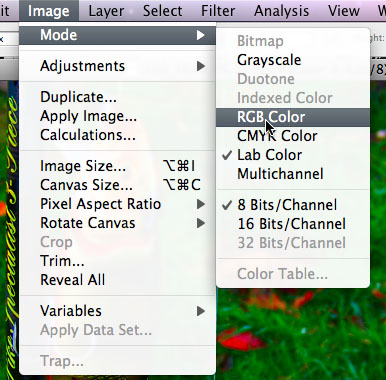
Revert back to RGB color mode, otherwise this can create problems when further editing the picture!

Good job, you’ve now gotten yourself a lot more color! Is it a bit too much? Fiddle around with the Saturation settings until you get what you like!
Did you like this or have any questions? Comment!