Background
This is how an article at Microsoft’s TechNet describes the changes in Vista’s sharing.
- The default workgroup name in Windows Vista has been changed to WORKGROUP. In Windows® XP Home Edition, the default workgroup name is MSHOME. If you upgrade a computer running Windows XP Home Edition to Windows Vista, it will keep its existing workgroup name. However, new computers with Windows Vista can have a different workgroup name than the other computers on your network. With different workgroups, it takes more time and effort to view all of the computers on the network.
- Windows Vista uses the Public folder, rather than the Shared Documents folder in Windows XP, to simplify file sharing. With Public folder sharing enabled, the public folders and all of the folders within the Public folder are automatically shared with the name Public. You do not have to configure file sharing on separate folders. You only have to either move or copy the file or folder you want to share on the network to the Public folder.
- Windows Vista by default does not allow simple file sharing. Access to shared folders, including the public folder (if shared), requires a user name and password. Simple file sharing is enabled by default in Windows XP Home Edition.
Sharing hard drives was perhaps not easy in Windows XP, but it sure is harder on Vista. It took me a while to figure out what to do, but after a bit of messing around with security settings I finally achieved what I had intended. This guide consists of five steps, and I take no responsibility for what happens with your computer!
Steps
#1
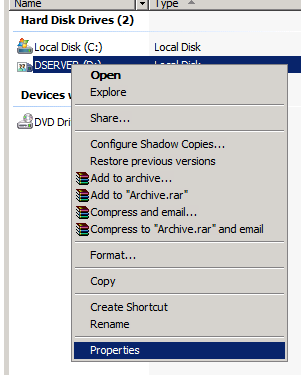
Right-click on the harddrive you intend to share. Click Properties to open a window with most changeable settings on your harddrive.
#2
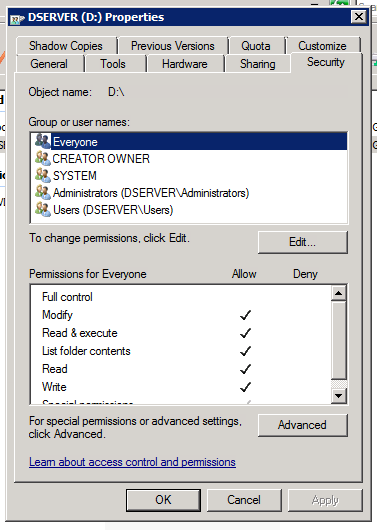
Select the Security tab. In front of you is a list of the different users that have access to your hard drive. Select Everyone and click Edit….
#3
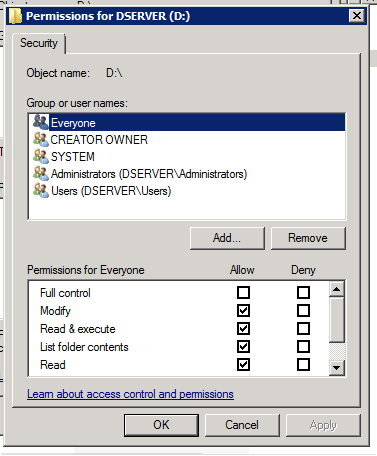
At this prompt you have the ability to change how much you want everyone to have access to. Customize this yourself, or use my settings, then apply the settings by OK-ing this window and the previous one.
#4
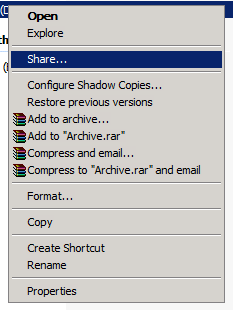
Now, right-click the hard drive again but this time select Share…. In the prompt (which is the sharing tab in the properties-prompt) click Advanced Sharing… and authenticate yourself if needed.
#5
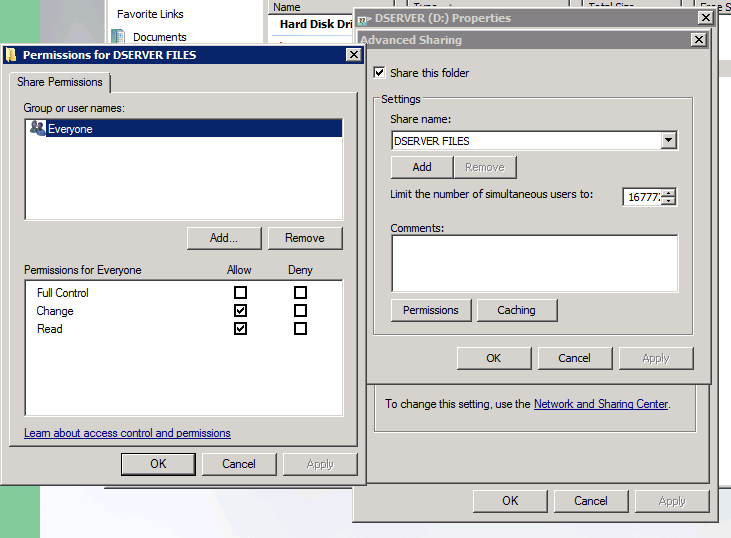
In the window in front of you, check the Share this folder checkbox and enter a name for the share. If you need to specifcy the amount of simultaneous users, do so, but for most home networks this is not needed. To enable everyone to access the share, click Premissions and use either my settings or your own.
Conclusion
There are of course security implications associated with sharing an entire hard drive. You should avoid sharing the drive you’re booting from and/or using Windows on, also you should also generally be careful of how much you’re letting people do with the drive.
5 replies on “How to Share a Hard Drive on a Vista Network”
i love these site
can you set up personal profiles so that one computer has full access to the hard drive while the another can only read the files on the hard drive?
Yes, you can!
If you look at the last step (#5) you can click “Add…” and then specify who you’d like to have what kind of access.
It should be noted that the Vista user interface for troubleshooting, configuring and working with LAN connections has changed dramatically from prior versions of Microsoft Windows. Users can utilize of the brand new “Network and Sharing Center” to check the status of their LAN connections, and to get into all aspects of configuration. An individual icon in the notification area shows connectivity through all LAN adapters, whether wireless or wired.
Thanks for the info…………..